Are you looking for a fun promotion to run for your customers? Well, look no further, because the new Quiz app from Woobox is the perfect promotion for fun-seekers! With this application, you can set up a personality-style quiz to allow your customers to interact with your Facebook Page while also entering themselves into a contest. In this article, we will go over the process involved in creating a Quiz promotion from start to finish.
1) Creating Your Quiz
To initially create your quiz, you’ll first want to click the Quiz icon in the offer tiles from your Promotions dashboard (see image below).
NOTE: If you’ve already created one or more offers in the past, you’ll just want to click on the big green button in the top right corner, and select Quiz from the dropdown menu.
The next thing you’ll see is the main setup page, where you’ll input your offer’s Title, Description, and Restrictions (if you have any). After you’ve set up the details, you’ll move on to the main quiz settings; including limiting entries to one per user, or leaving it open for unlimited participation. When you click the big green button at the bottom of the screen, you’ll be redirected to the next step: adding questions to your quiz.

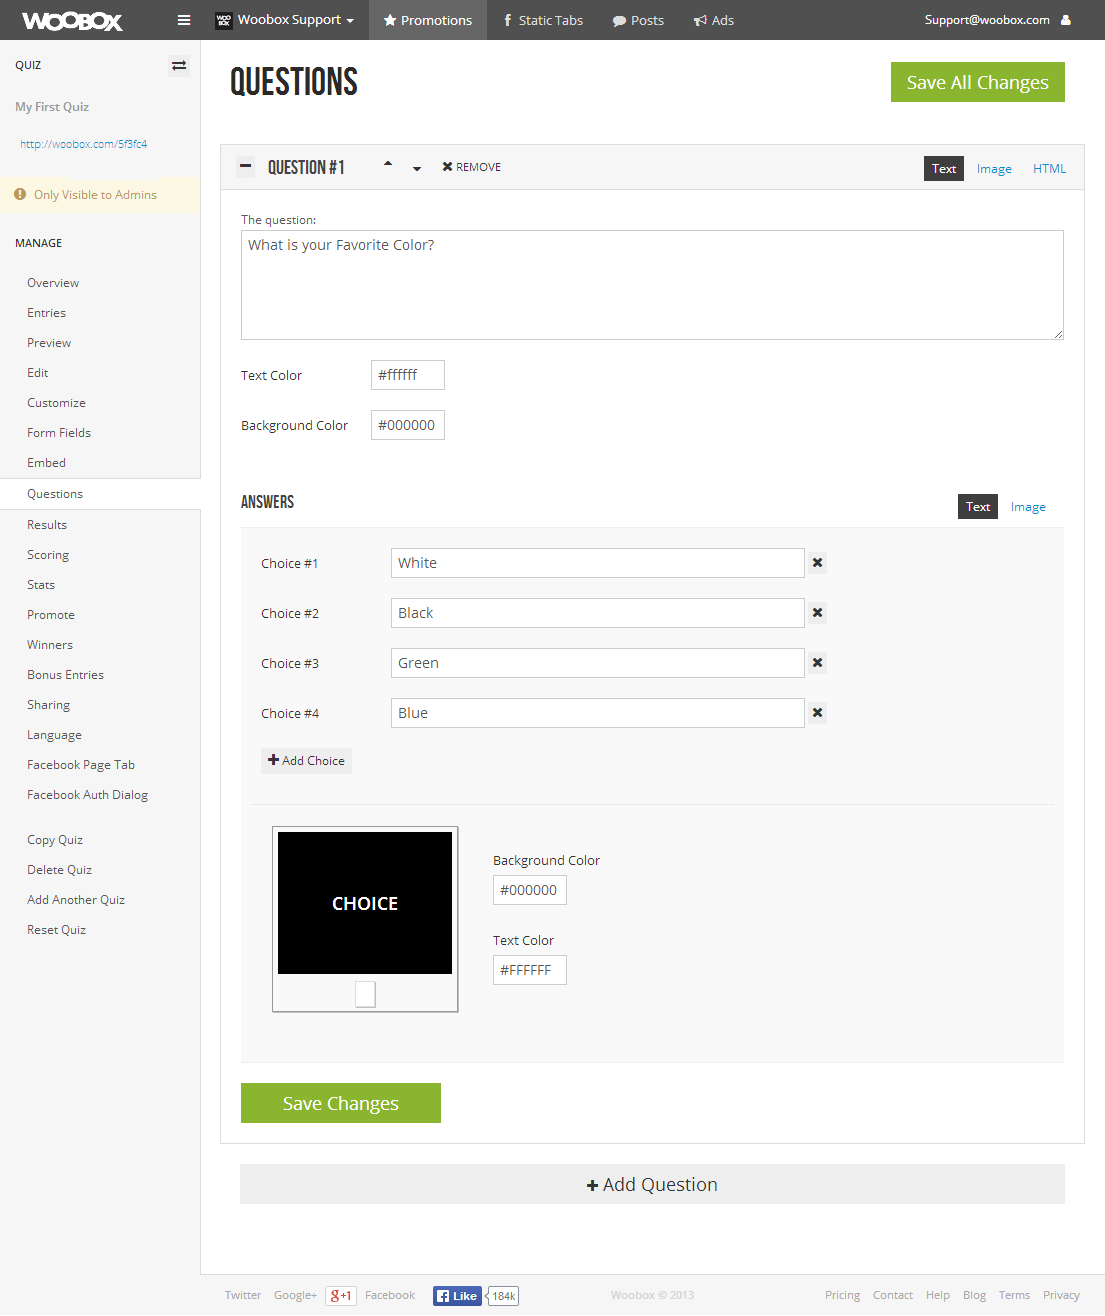
2) Adding Questions
Creating questions for your quiz is quite customizable. Similar to our Polls app, you can select one of three options for setting up the individual question(s) content: Text, Image, or HTML. With the first two options, you will also be given the option to select the text and background color(s) for each question (so you can keep it the same for all questions, or mix it up).
The same goes for the Answers you add for each question. You can add answer choices as either Text or Image uploads, and you’ll be able to customize the colors for each group of answer choices as well.
While there is no limit on the number of quiz questions/answers you can have, we’ve typically recommend keeping it somewhat concise; as you may see a drop-off of users who actually finish the quiz if they are required to answer too many questions… Our recommendation would be about 10 questions max. Once you’ve completed an individual question and its answer choices, simply click the big green “Save Changes” button and move forward.
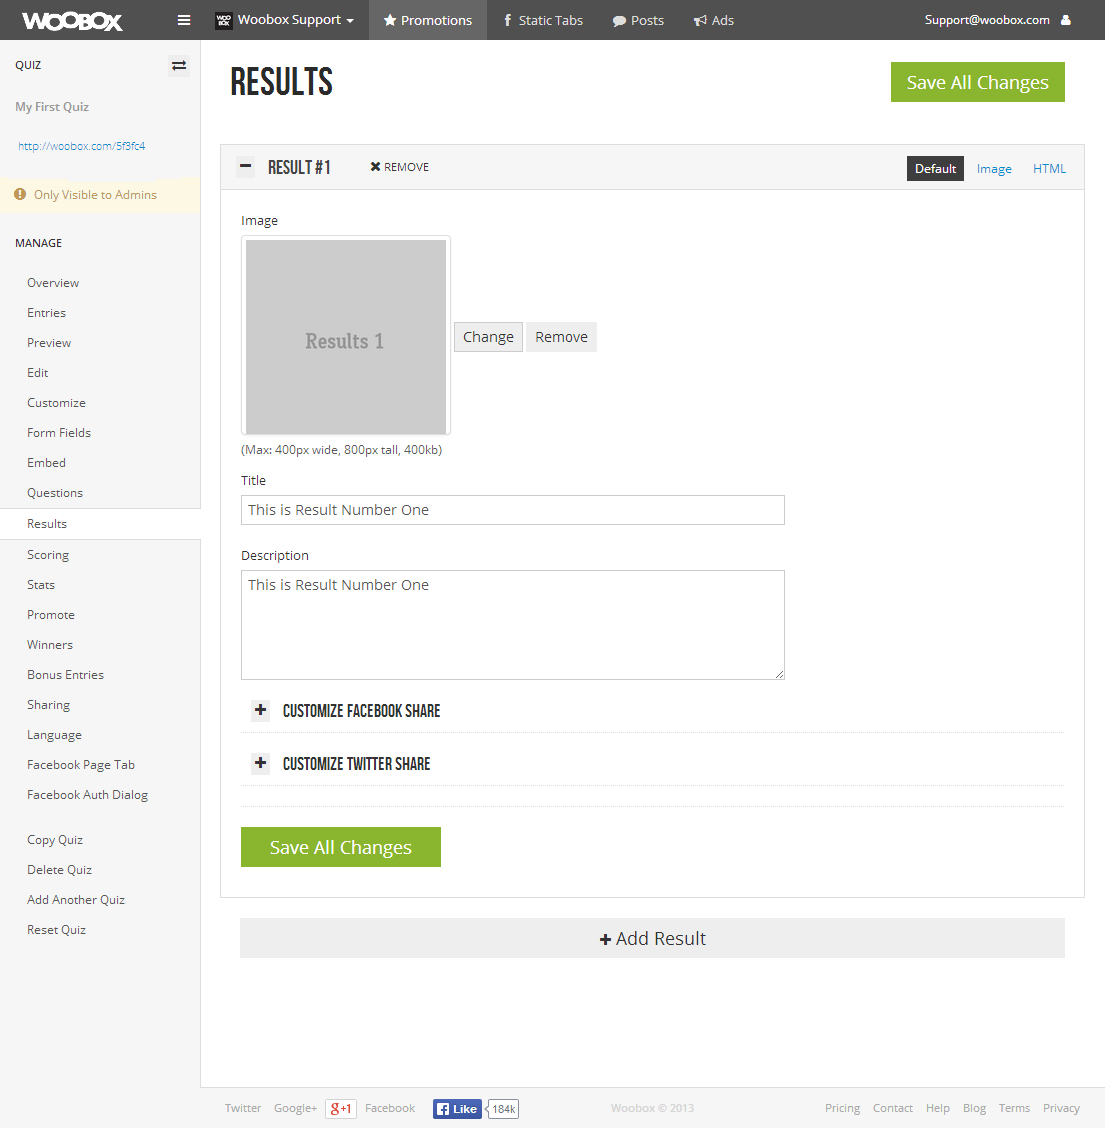
3) Adding Results
Adding the results for your quiz presents you with another customizable setup for each result you add. You can add the results as Default (text + optional image), Image (no text), or HTML. Each result you add will also give you the option to customize the Twitter and Facebook Share dialogs. If you choose not to customize those specifically, the app will use the Title & Description for the default share dialog text. Since this is your first quiz, we’d recommend keeping it somewhat simple, and limiting your results to 2-4 options at this point.
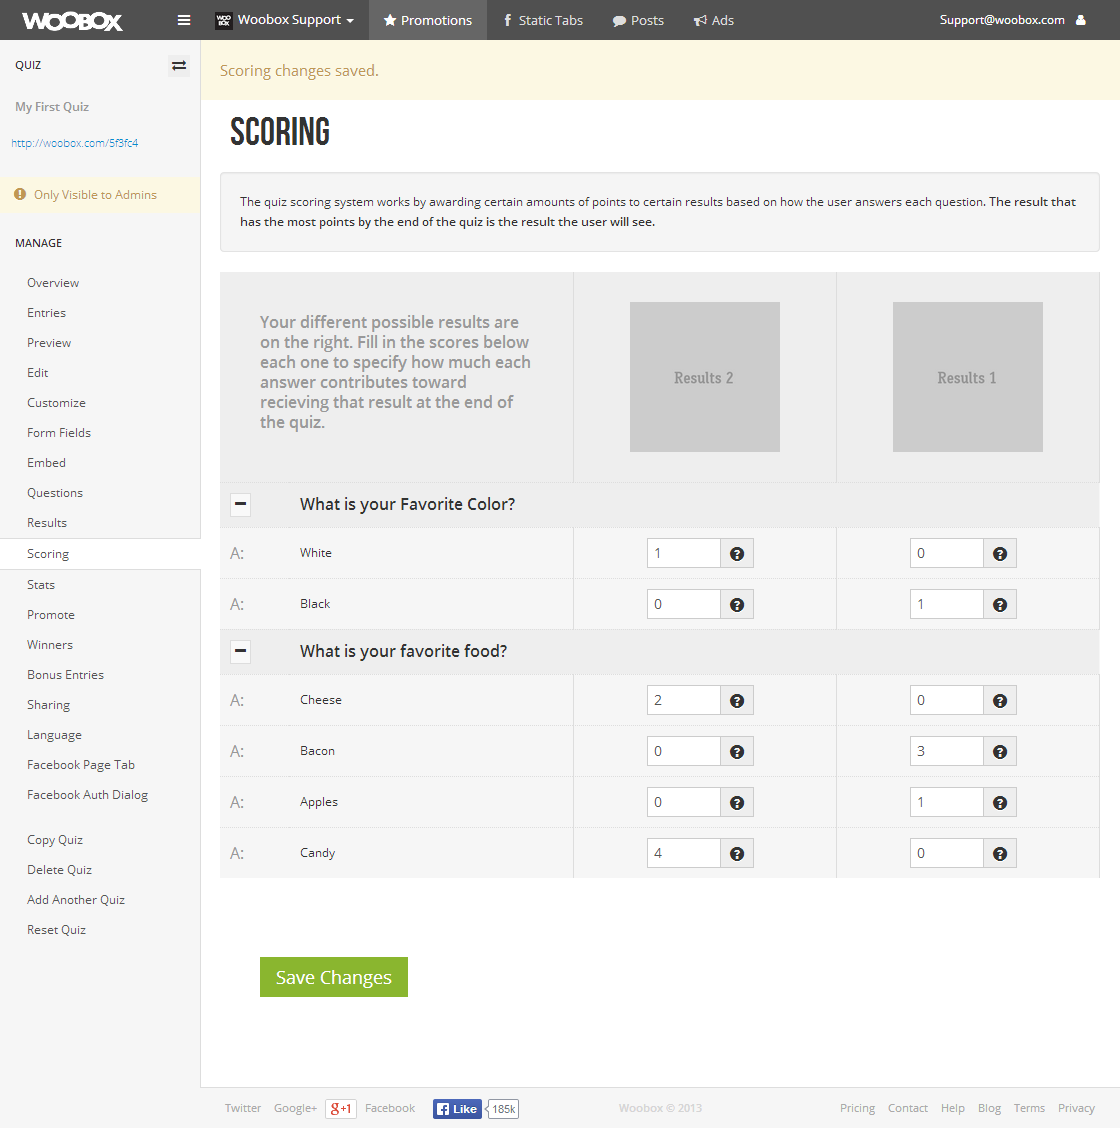
4) Scoring the Quiz
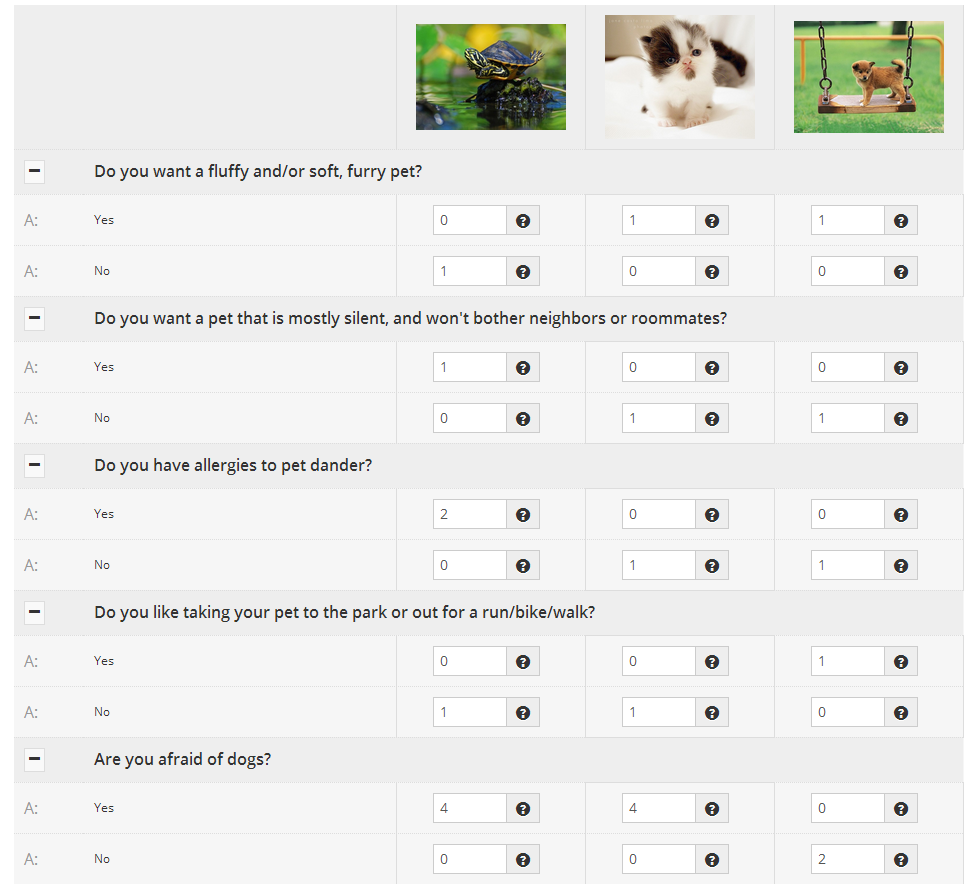
Scoring for the quiz is determined by awarding specified point values to each answer choice in relation to each result option. Each answer choice can have any number of points awarded toward each result option. The result will be selected based on the total score of all the answer choices, whichever result option has the greatest number of points will be the user’s quiz result.
TIP: The easiest way to do this is to keep the scoring range the same for each question and answer option (e.g., award 1 point for a correct answer, and 0 points for an incorrect answer). If you have a question for which the “correct” answer will strictly apply to one of your results, you would want to award that particular answer choice more points under the associated result column (click the right-hand image below to see an example).
5) Customizing Your Quiz
Now that you’ve gotten all the big pieces of the quiz framework set up, it’s time to customize your quiz! Under the Customize page of the offer dashboard, you can add an image to the Quiz Page and/or Results Page (to act as sort of a header for the layout). Additionally, if you want to collect extra information from participants, you can add inputs to the form via the Form Fields page of the dashboard. Of course, none of these things are required, but they are available for you to create a more custom quiz.
6) Embedding Your Quiz
Depending on where you plan for this contest to be hosted, you can choose to install it on your Facebook Page from the Facebook Page Tab section of the offer dashboard; or, if you’d like to embed it on a WordPress site, you can find instructions for doing so in this blog post.
7) Promoting Your Quiz
As with all Woobox offers and apps, when you promote the quiz, you’ll always want to make sure you’re using the shareable offer URL (http://woobox.com/xxxxxx). This URL is mobile-friendly and will automatically detect mobile users and redirect them to the mobile version of the offer; while non-mobile users will be taken to the appropriate version for them (e.g., your Facebook Page Tab).
Check out our live quiz example below!


Build a campaign in seconds
Describe a giveaway, quiz, poll, survey, or coupon and Woobox launches a hosted, mobile-ready page in seconds. Free to start, no credit card.
Try Woobox free