

Want to add your 360 Tour or map of your location to your Facebook page? With Woobox Static Tabs, it’s easier than ever.
Here’s how:
If you do not have a Google 360 Tour, these instructions will also apply to a Google map or street view.
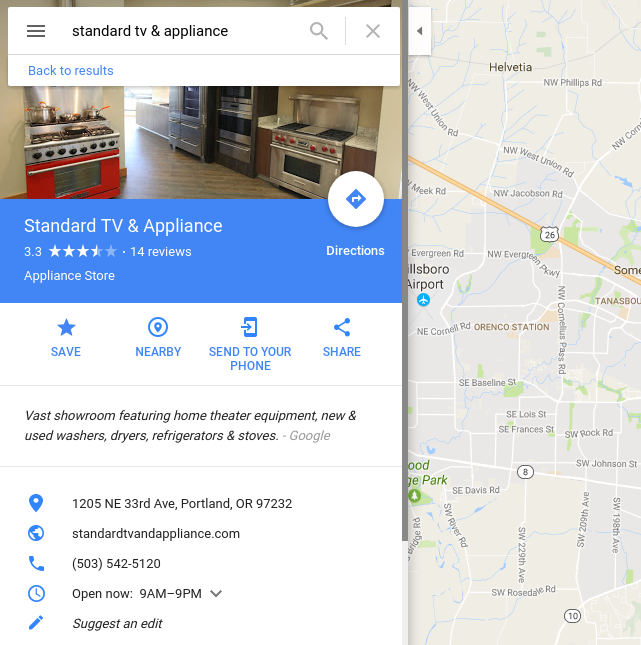
1: Look up your business on Google maps.

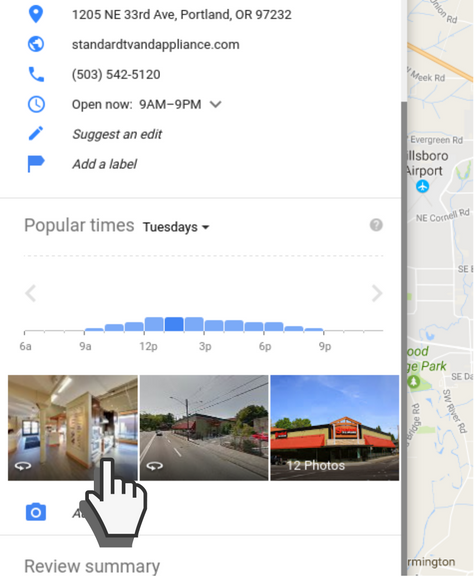
2: Scroll down to the “See inside” image below and click it (the Street View option will be in the same area). To display just the map, you can skip this step.

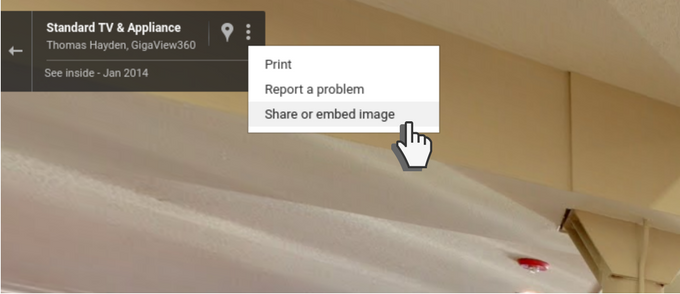
3: Now, click the 3 dots near the business name in the upper left corner and select “Share or embed image.”

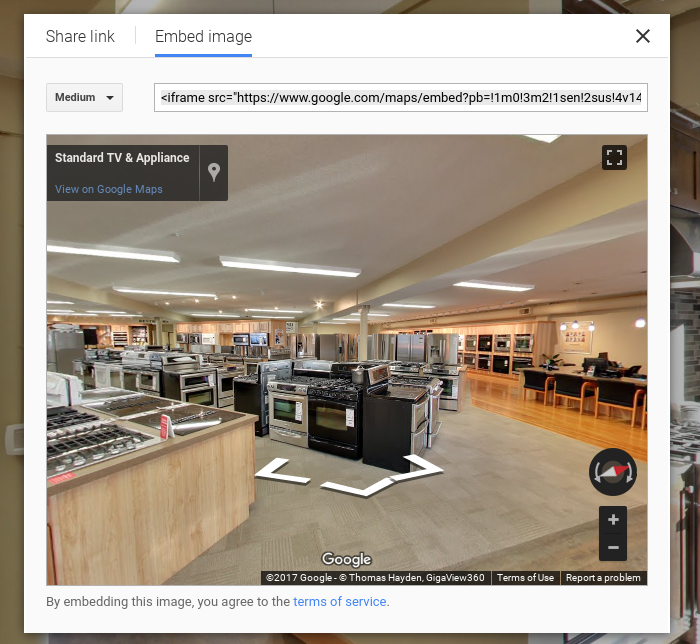
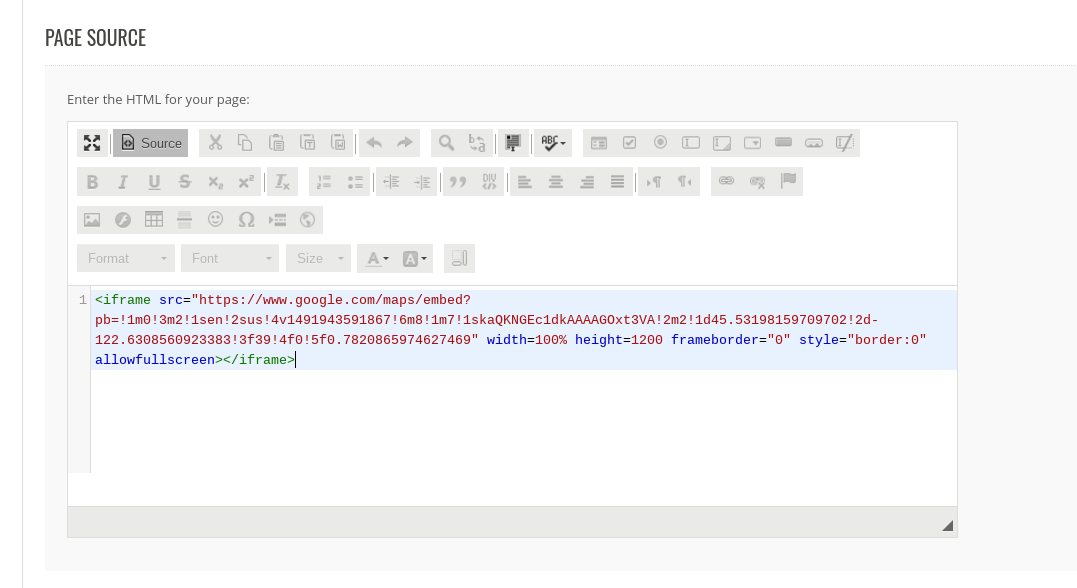
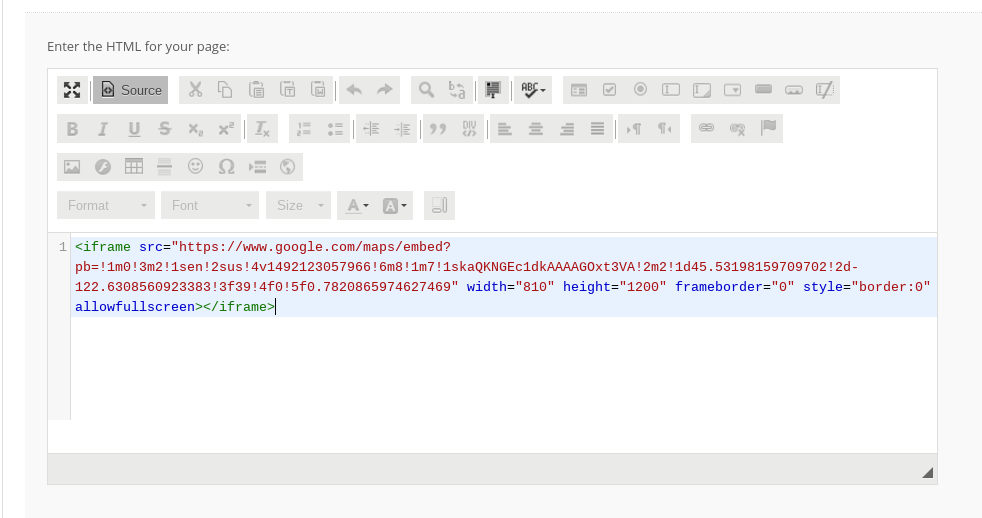
4: At the top of the popup window, click “Embed image” and adjust the view of the tour (this will be the starting point first seen by visitors) then copy the embed code.

NOTE:
For sizing, you have 2 options, you can click the size dropdown and enter 810 (the width of a Facebook tab) by about 1200:
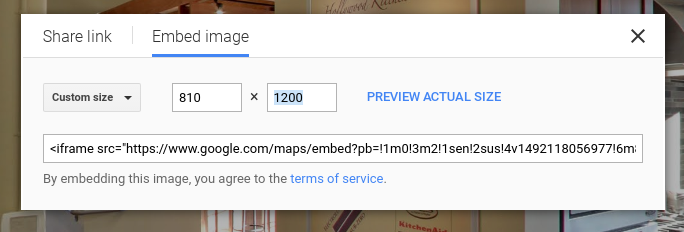
Or, after the next step, you can change the width to 100% and adjust the height in pixels:


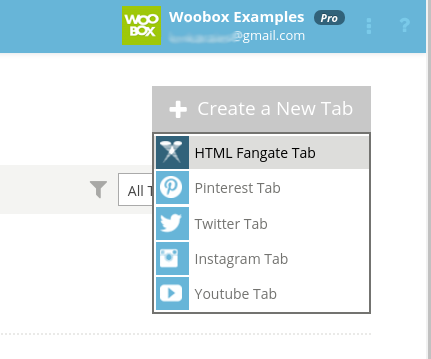
5: Login to your Woobox dashboard, click Static Tabs, then Create a New Tab -> HTML Fangate Tab.

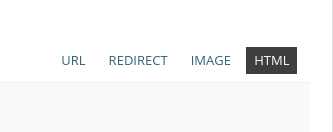
6: Switch the tab to HTML mode and paste in the embed code. Be sure to save your settings at the bottom of this screen.


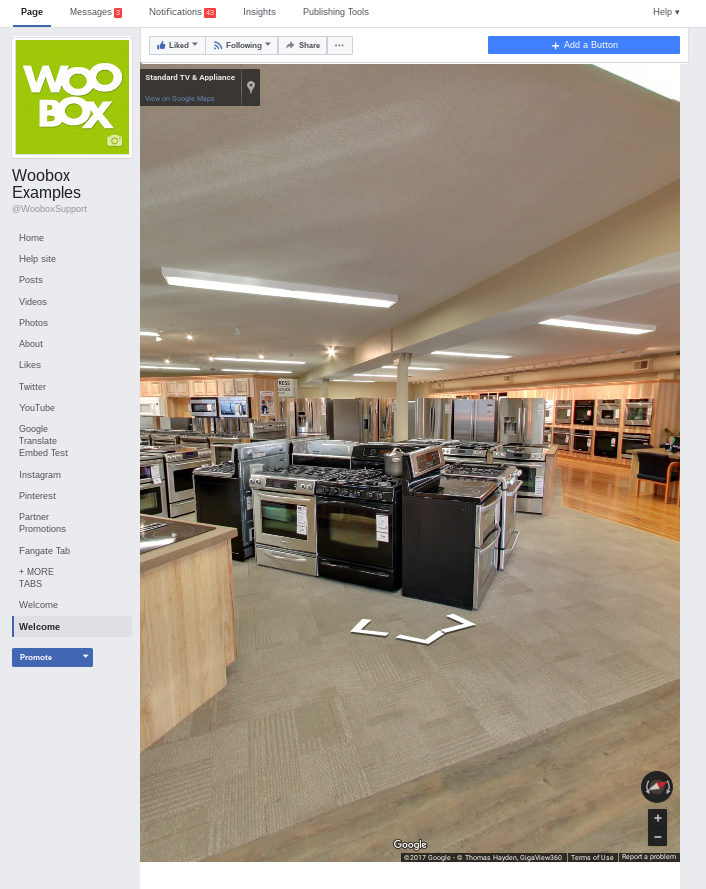
The final product should look like this on your Facebook page:

If you have a paid subscription, you can display your tour or map with a Landing Page app or add your 360 Tour to any campaign by using an HTML element. With this method, you could design a Quiz around your space, ensuring that users check out the tour before entering. You can even get fans involved in your office remodel or redesign by adding the tour to a Poll or Form app and asking users for their feedback or suggestions.
If you have any questions about adding a Google map or tour to your page, or want to know what else you can do with an HTML Fangate Tab, email us at support@woobox.com!