
There are a lot of tabs, buttons, and controls in your Woobox dashboard and sometimes it can be hard to find the setting you’re looking for. This article is meant to help familiarize you with some of the harder-to-find controls and make you look like the pro you are!
Businesses and account settings
Managing as another business, upgrading your plan, and changing business, billing, and account settings can be done by accessing the dropdown menus under your business page’s name and your login email. Detailed information about those controls can be found in this previous blog.
Rules and Advanced Settings
*Updated to reflect 2017 dashboard updates* Clicking Advanced in your offer’s left navigation will open a drop-down menu. The first option in this menu is Rules (in old-builder offers such as Deals and Group Deals, the rules section is still at the bottom of the Customize screen). Not only can you type or paste in rules, but you can also use HTML here, or just add the URL where your general contest rules are already hosted. Using the rules URL field will cause the “official rules” link below your offer to redirect to your online hosted rules page, and using the text field, the link will open your text rules in another tab.
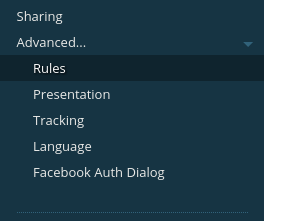

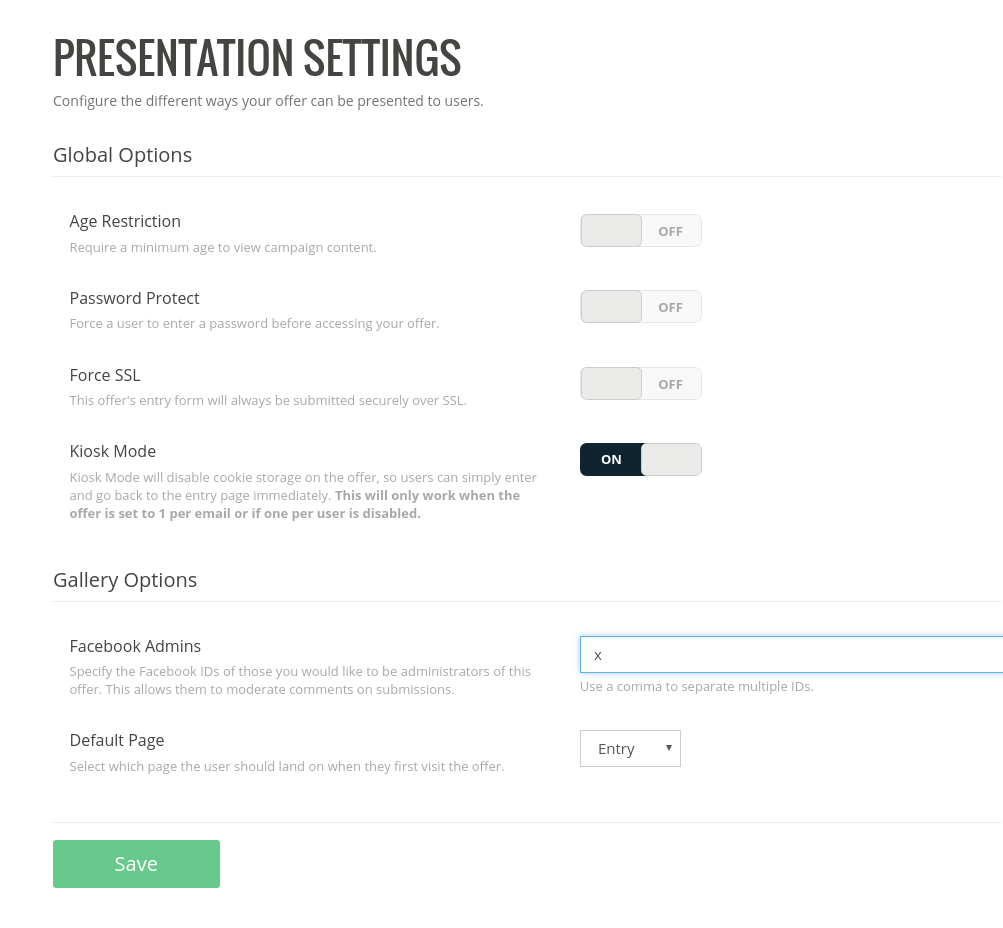
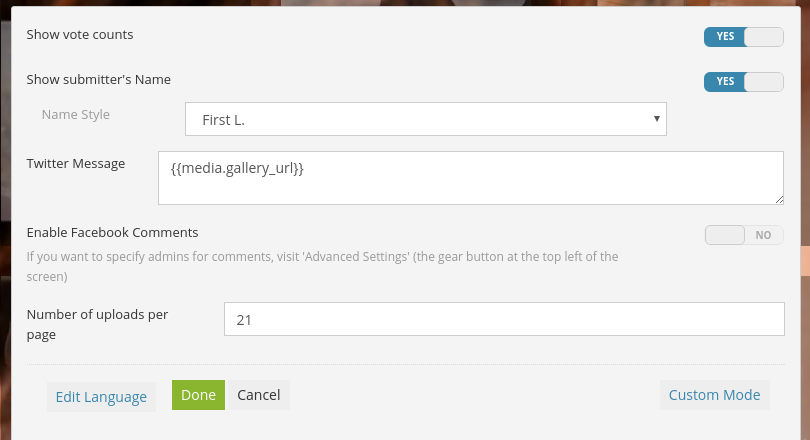
The next option in the menu is Presentation. In this section, you can enable Age Restriction, Password Protection, Force SSL (which ensures that offer’s entry form will always be submitted securely over SSL) and Kiosk Mode (which disables cookie storage in the offer). In Photo, Video, and UGC Contests, you will also see Gallery Options which include Facebook Admins (the FB ID of admins who can moderate comments on submissions) and Default Page (which page visitors will land on).

Tracking is where you can add your Google Analytics ID and your Facebook tracking pixel as well as define the conversion event.


In the Language section, you will find every line of text that may appear in your offer. In the empty field to the right of the dialogue, you can translate these lines to your demographic’s native language or just edit the default text to something a little more hip.
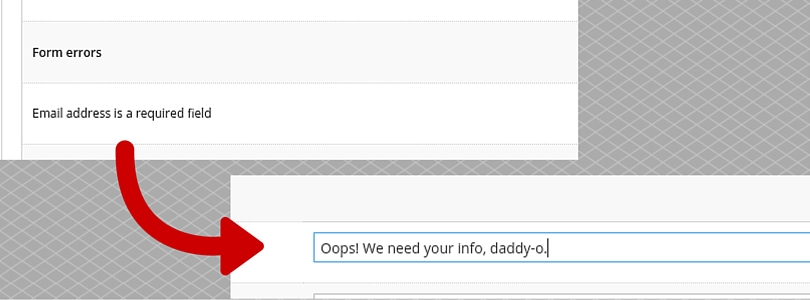

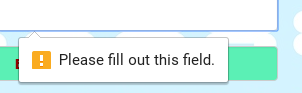
Form validation errors like the one seen here are responsive to your browser’s language settings and cannot be edited in the Language section.

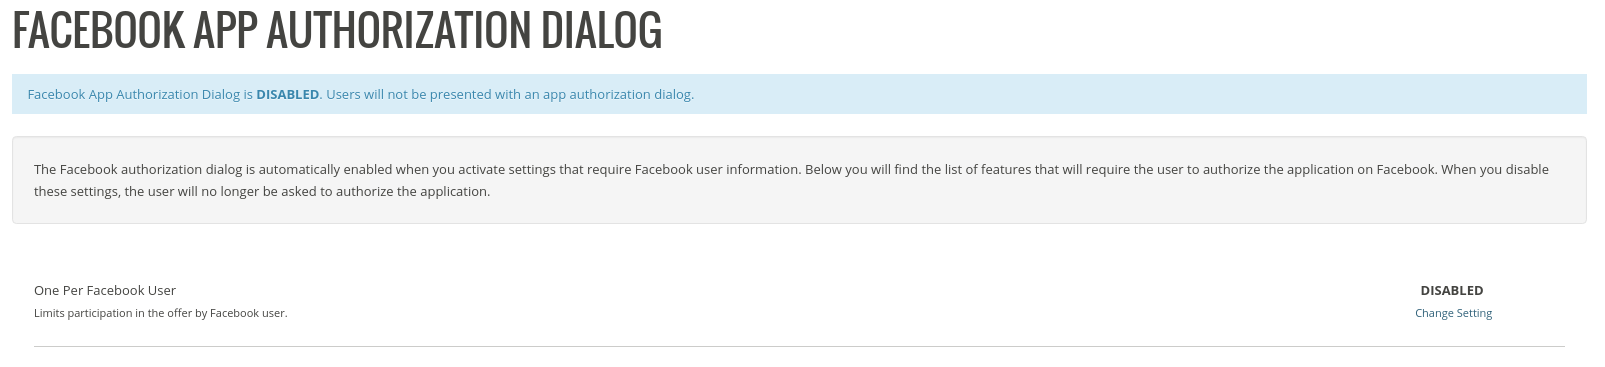
The final item under Advanced is Facebook Auth Dialog. Here you can see if Facebook app authorization is required for your offer and which setting makes it required.

Alignment/layout tabs (new builder only)
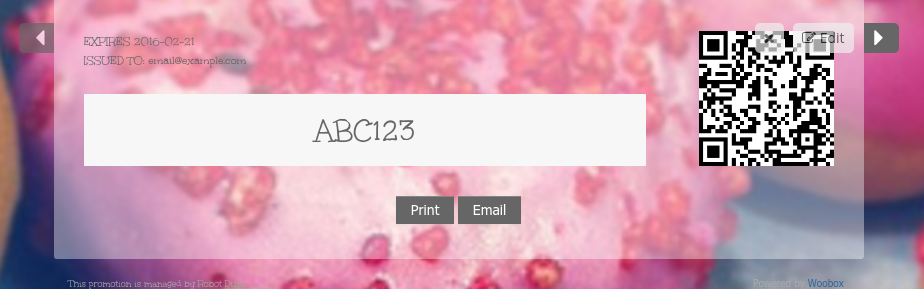
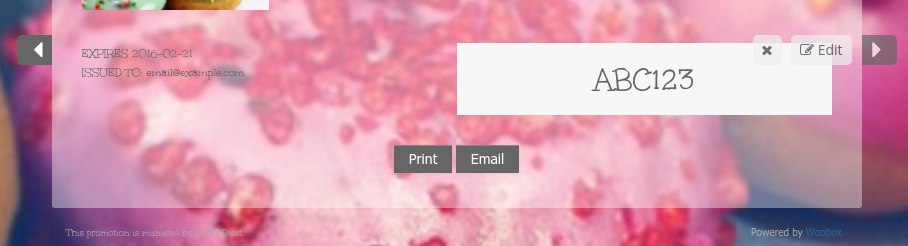
In the Customize screen, let’s take a look at an often overlooked but very handy control. Hover your mouse-cursor over any text component (Title, Content, or Heading) and you will see a grey tab with a white arrow (triangle) on either side of the component. Clicking these directional tabs will cycle the component through some alignment options. You’ll notice these tabs on a Poll choice component where you can choose between two different layouts, content components where you can choose with or without an image and the location of that image, and voucher components that allow you to scroll through display options and choose whether or not to display the QR code.
Before clicking the tab:

After clicking the tab:

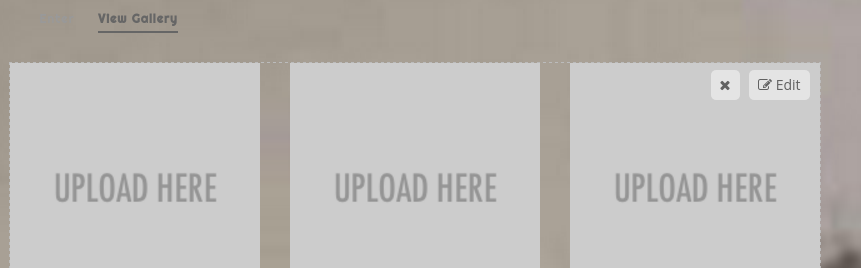
Each component (now called ‘Elements’) has an “Edit” button that appears in the upper right corner on hover. Some components have certain display controls hidden inside, like this gallery component in a Photo, Video or UGC Contest:


There is also a guided “tour” of the customize section that can be accessed by clicking the “?” icon in left navigation of the Customize screen.

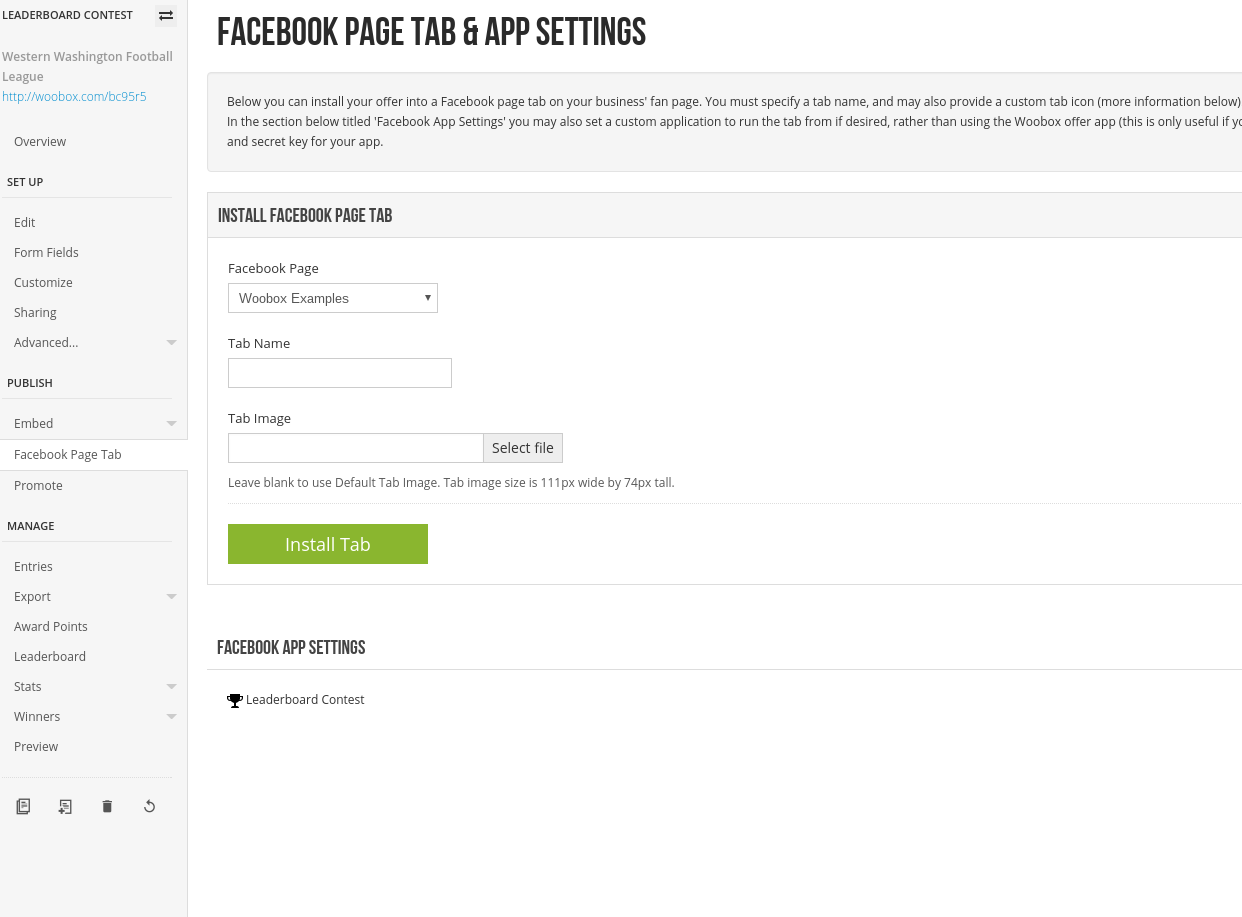
Installing your offer tab to multiple Facebook pages
If you have already installed a Facebook page tab for your offer and you return to the Facebook page tab section in the dashboard, you will see a “Install another tab” button. Clicking this button will lead you to a screen with either a drop-down menu containing your pages, or all of your pages displayed on the screen (depending on the offer). Select the page you want the tab on and click “Install tab.” As long as the other businesses are on a paid subscription, you can install tabs for this offer to multiple pages. Now your promotion is hosted on all of your associated pages, and all entries/submissions will be aggregated into the offer in your Woobox dashboard.
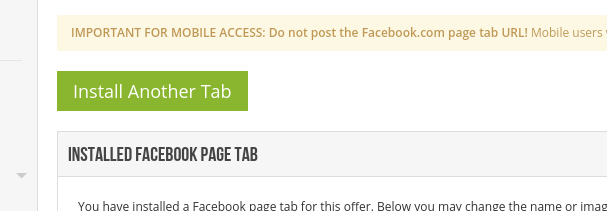

After clicking “Install another tab:”

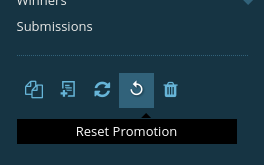
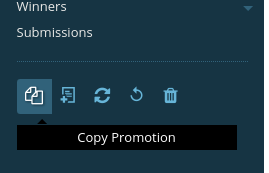
Copy and Reset promotion buttons
Want to create a promotion just as beautiful and effective as your last? Why not copy or reuse the offer you want to recreate? At the bottom of the left navigation while managing your offer, there are 4 icons. The icon on the far right will reset the offer, clearing all entries and stats so you can start the promotion again and collect all new information.

The icon on the far left will copy the promotion. This will make an exact copy of the promotion but without entries or submissions. *You can copy an offer to the same page, or to one of your other businesses. Copied promotions will have a new/unique URL.

With knowledge comes power! Log-in today to implement all these settings and more. Can’t find a setting? Have questions? Email us at Support@woobox.com