While creating a custom graphic for your contest or promotion is not a requirement to launch a Woobox campaign, it does make for a more visually compelling promotion – and can lend excitement to your campaign! You don’t have to be a graphic designer to create a campaign that is graphically stimulating, you just need to know where to look for images and how to put the pieces together.
Finding Just the Right Image to Go with Your Promotion
There are dozens of stock photography resources on the web, where you can find everything from cute kittens to funny animation. Here are a list of our go-to resources (some are even free!):
- 1) Veer
- 2) Foto Search
- 3) Morgue File
- 4) iStock
- 5) Free Images
- 6) Flickr
- 7) Shutterstock
- 8) Getty Images
- 9) Big Stock Photo
Can’t Find the Perfect Image? Take Your Own!
If you have a highly unique product or service and can’t find (or don’t want to pay for) stock photography, you can take quality images of your own, you just need to use a few tricks to make sure that you get the very best image quality possible – even if you are using your smartphone!
1) Get to Know Your Camera App – Play around with your phone’s camera and test out all those little icons to get a feel for what each one does. If you are totally lost, do a Google search for you phone’s make and model – chances are there is a video tutorial out here that will guide you through it.
2) Clean Your Lens! – Sometimes the most obvious answer is the most overlooked – you can’t take a decent photo if you’re working with a dirty lens.
3) Only Use Your Flash if it is Absolutely Necessary – Try to create a light, bright atmosphere for your photo, especially if it is a close-up product shot. Flashes can often place unwanted glares on your product, so if you can take the photo without a flash, all the better!
4) Check Your Resolution – Make sure your resolution setting is set to the highest it can go. The higher your resolution, the clearer your photos will be.
5) Check the Background and Surroundings – Before you snap the photo, see if there is anything distracting in view. You want the photo to highlight the subject, not a stray dog that wanders into the shot!
6) Don’t Zoom! – Using the zoom feature often results in grainy, blurry images. So instead of zooming in on your subject, re-position yourself so that you are nice and close, or crop it later if you can’t get as close as you need to.
7) Need to Edit Your Image? There’s an App for That! – While there is no lack of resources to edit your photo or add a cool filter, our top pic is Pixlr. It’s free, and it’s available on iOS, Android, and even on your desktop! The app includes a whole host of editing options, so take some time to familiarize yourself with what it can (and can’t) do.
Build Your Graphics
Now that you have the perfect photo, its time to build the individual graphics for the Pre-Start Page, Entry Page, Post-Entry Page, and Ended Page. TIP: use the same or similar images for each page, and simply change the text that accompanies it for each page. This offers consistency in your branding of your promotion, and makes it easier for you to manage the creative assets. When you build your graphics, keep in mind that the maximum dimensions are Max: 810 px wide x 1200 px tall, with a max file size of 400 kb. Your image can be smaller than that, but we recommend you at least use the full width for your image to best utilize the space provided.
As mentioned previously, our favorite resource for simple photo editing and text is Pixlr, however, if you are looking for something more robust, you can use other free graphics software, like GIMP, Inkscape and Scribus. There is a bit of a learning curve, but once you invest the time in learning how to use the tools you can create some really great graphics. For more advanced functionality, consider investing in Adobe Photoshop – you can find a whole host of video tutorials on the web to learn how to use it!
Check out a couple examples from Woobox customers:
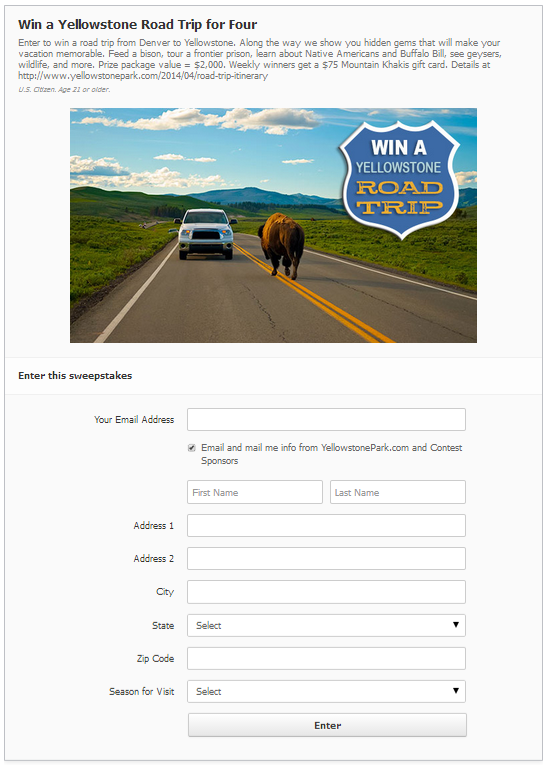
Yellowstone National Park – This is the perfect example of how to add a custom graphic to your promotion to spice it up, but still use the standard entry form available through Woobox (no coding skills required!).
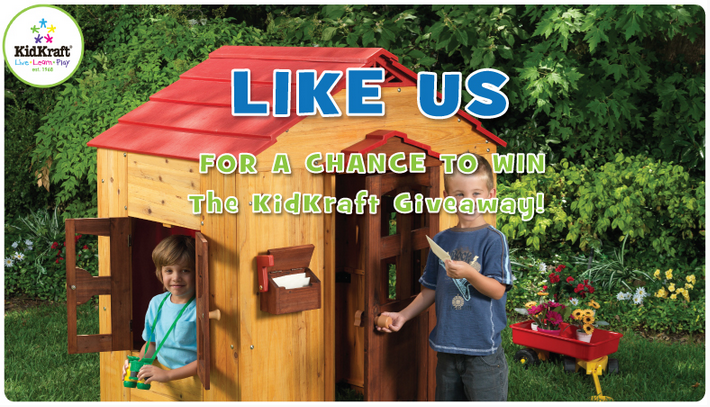
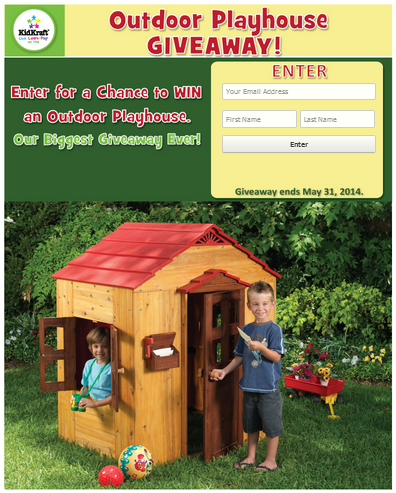
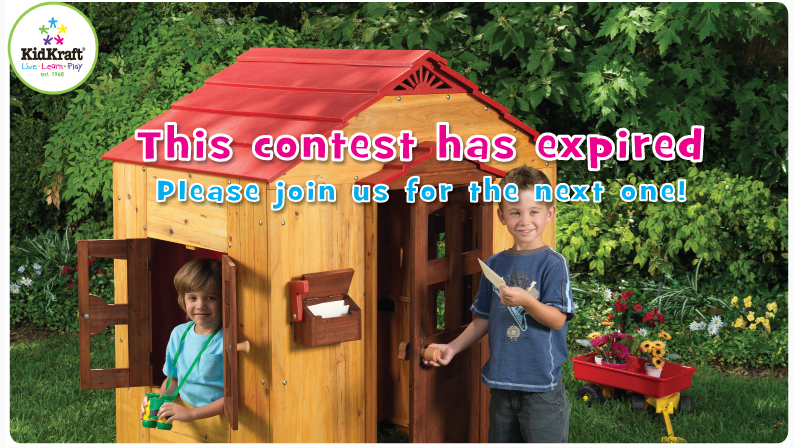
KidKraft – For their outdoor playhouse giveaway, KidKraft used the same image for the fangate, entry page and ended page, but changed the text on each photo to include a page-specific message or instructions. They also used the custom html feature to lay the entry form directly on top of the entry page image, for a seamlessly integrated graphic.
Whether you decide to utilize default forms and spice it up with a simple graphic, or go full-bore and create a more integrated campaign, using images are a simple and effective way to increase the virility of your promotion. Happy Wooboxing!