Set a budget, establish parameters, and let Woobox do the rest!
Our new Ad Trigger system allows you to automatically promote your content to your fans and custom audiences for ultimate ease and increased engagement. Instead of manually promoting all of your posts to your fans, for example, you can set an Ad Trigger that will automatically promote your posts based on the budget, duration, content and audience that you define. You can easily check on the performance of each Trigger and modify or cancel the Triggers that are under-performing, fine-tune Triggers when parameters change, or increase the budgets on the Triggers that are performing above expectations. Remember, each post that is triggered leads to more eyes and more clicks on your content.
By customizing the Triggers based on your target audience criteria, you ensure your posts will be seen by the audiences they are most relevant to. Here are just a few ways you can use our Ad Triggers to boost your content:
Promote your posts with higher-than-average engagement to fans of your competitors.
If your posts are getting great engagement organically, why not show fans of your competitors how awesome you are? Create an audience of your competitor’s customer base, and make a rule to promote your most popular posts to them based on a minimum “like” or “comment” count.
Set an ad trigger to automatically promote a post to Facebook users who visited your website.
We touched on the power of Website Remarketing previously, and our Ad Triggers tool automates those messages that you want to reach Facebook users who visited your website. You can set a monthly budget limit, so that you can keep your budget in check, and then use the ad stats to see how that audience is performing. You can turn off the Ad Trigger at any time.
Automatically promote posts that contain a specific keyword to a target audience.
For example, if you are a retailer that collects customer email addresses, you can create a custom audience that is made up of all those emails that are associated with Facebook accounts, and target a message that contains a target phrase, like “in-store sale” and every time you use that key message it will automatically promote your content to your email custom audience.
The possibilities are endless! Whenever you post to Facebook, our Ad Triggers system will determine if your post meets your pre-determined rules for promoting posts and will automatically promote them to the audience you selected. Dig in, experiment, and see what works.
Setting Up An Ad Trigger
Login to the Dashboard and click on the Ads tab. On the left, click on “Your Triggers”:
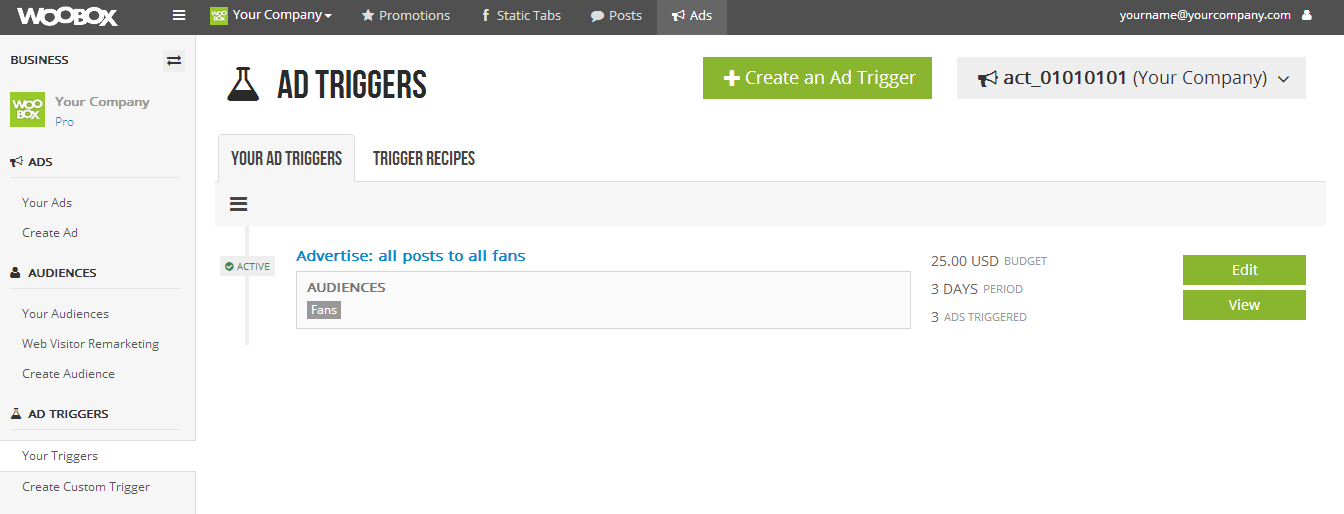
The first time you visit this page you won’t have any triggers listed in the “Your Ad Triggers” tab. In the above screenshot, you will see that we have set up an ad trigger to promote all of our posts to all of our fans for a three day period not to exceed $25. If we reach the $25 before the 3 days are over, the promoted post will stop showing up in fans newsfeed as a sponsored story. And vice versa, if we reach the end of the three days without reaching the $25 limit, the campaign will automatically end.
Trigger Recipes
The Ad Triggers system is ultimately about simplicity. So, Woobox has created (and will continue to add) pre-defined Trigger Recipes. With these recipes your Ad experience becomes even simpler: set a budget, set a time period, and save!
Click on the Trigger Recipes tab to view the available options:
- Advertise: All Posts to All Fans – Tired of only reaching a small percent of your fans with organic news feed distribution? Reach most of your fans for way less than you might expect.
- Advertise: All Posts Linking to your Website – Post your products with a link to your website on your Facebook page and let them advertise themselves!
- Advertise: Photo Posts to All Fans – Boost only your posts that feature a picture/photo, and ensure your Ad content is vibrant and eye-catching.
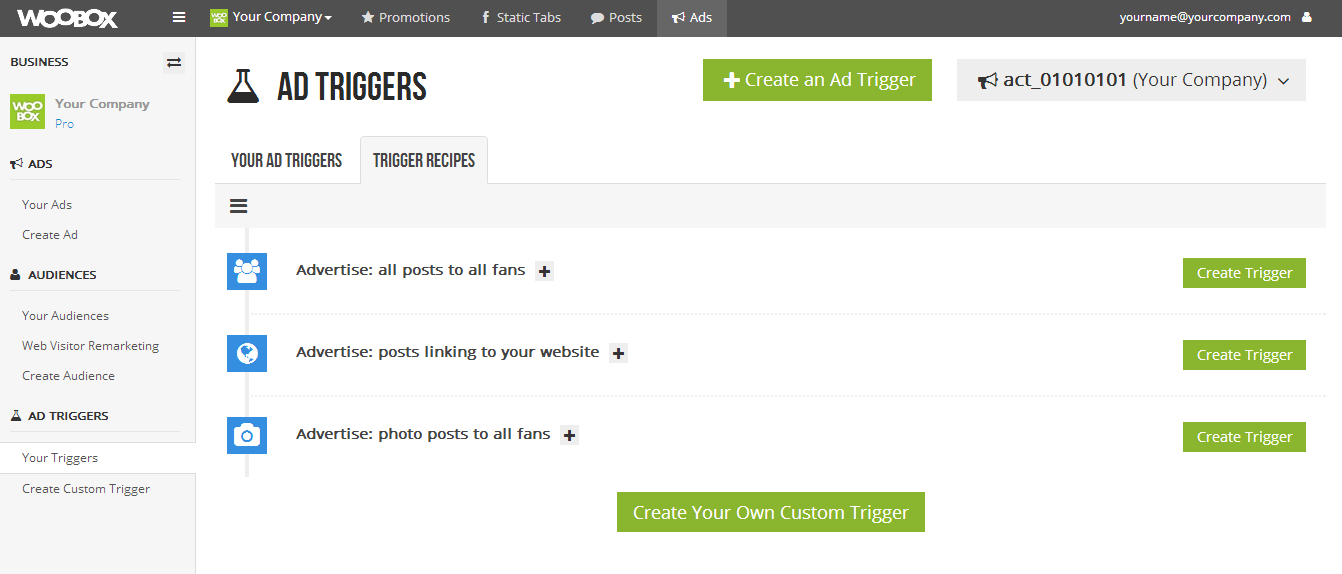
If these recipes don’t have what you need, you can Create Your Own Custom trigger by clicking on the link at the bottom of the page or from the link list on the left. Creating a custom trigger allows you to get very precise with your audience and trigger details. You can also shape who you reach with your automated triggers using our Audience Management tool.
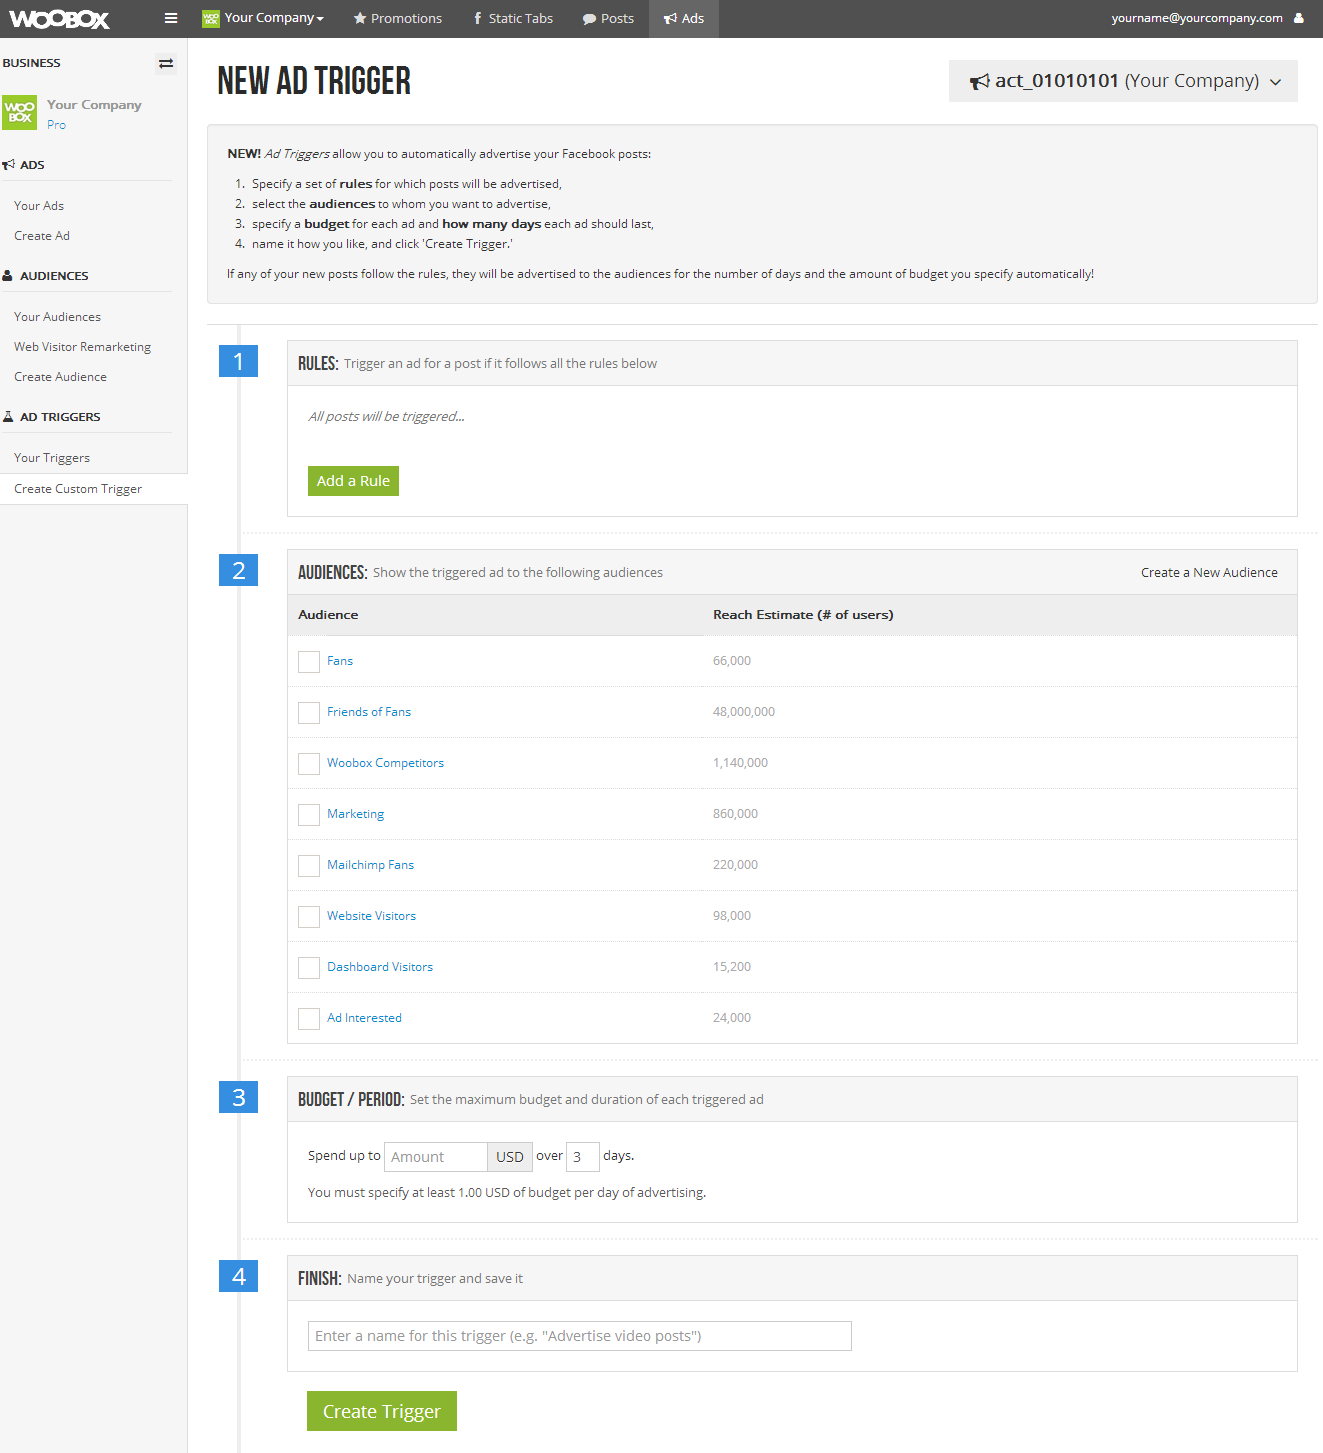
Define the Trigger Parameters. The first step in setting up a new ad trigger is to define the parameters which will trigger the ad. You do this by clicking on the “Add a Rule” button. A pop-up will provide you with the options to set those parameters:
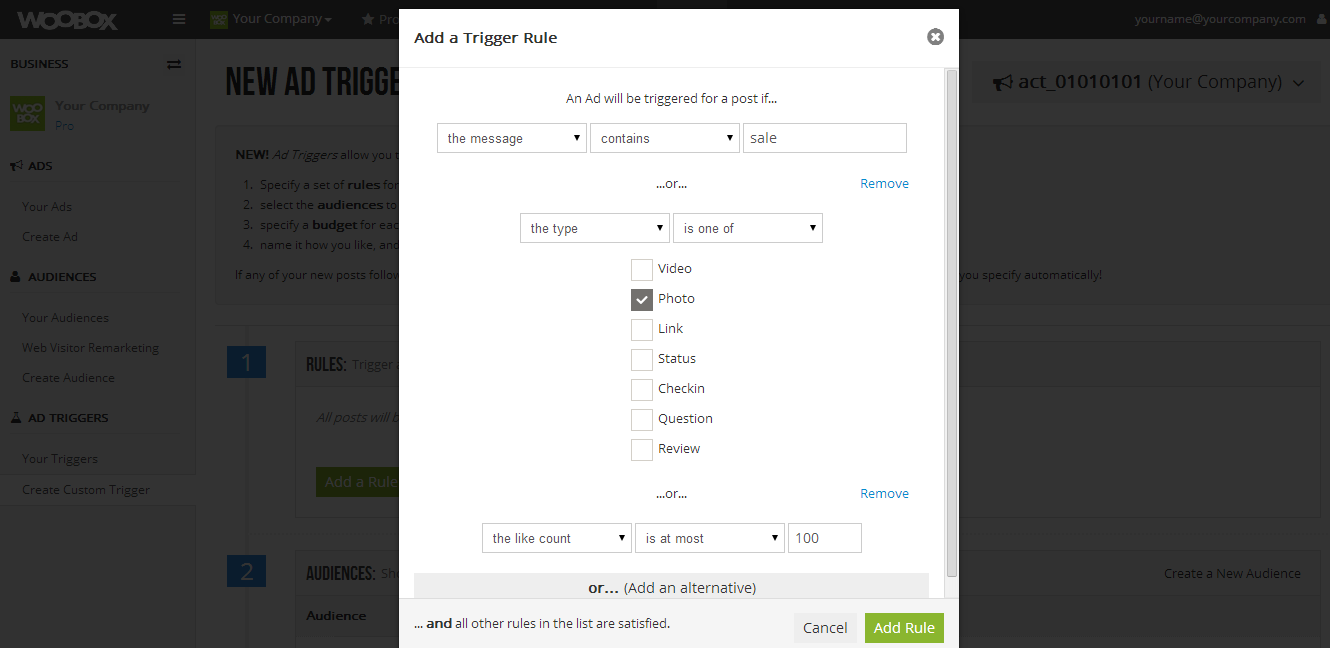
After you click on “Add Rule” it will add those parameters to your Ad Trigger.
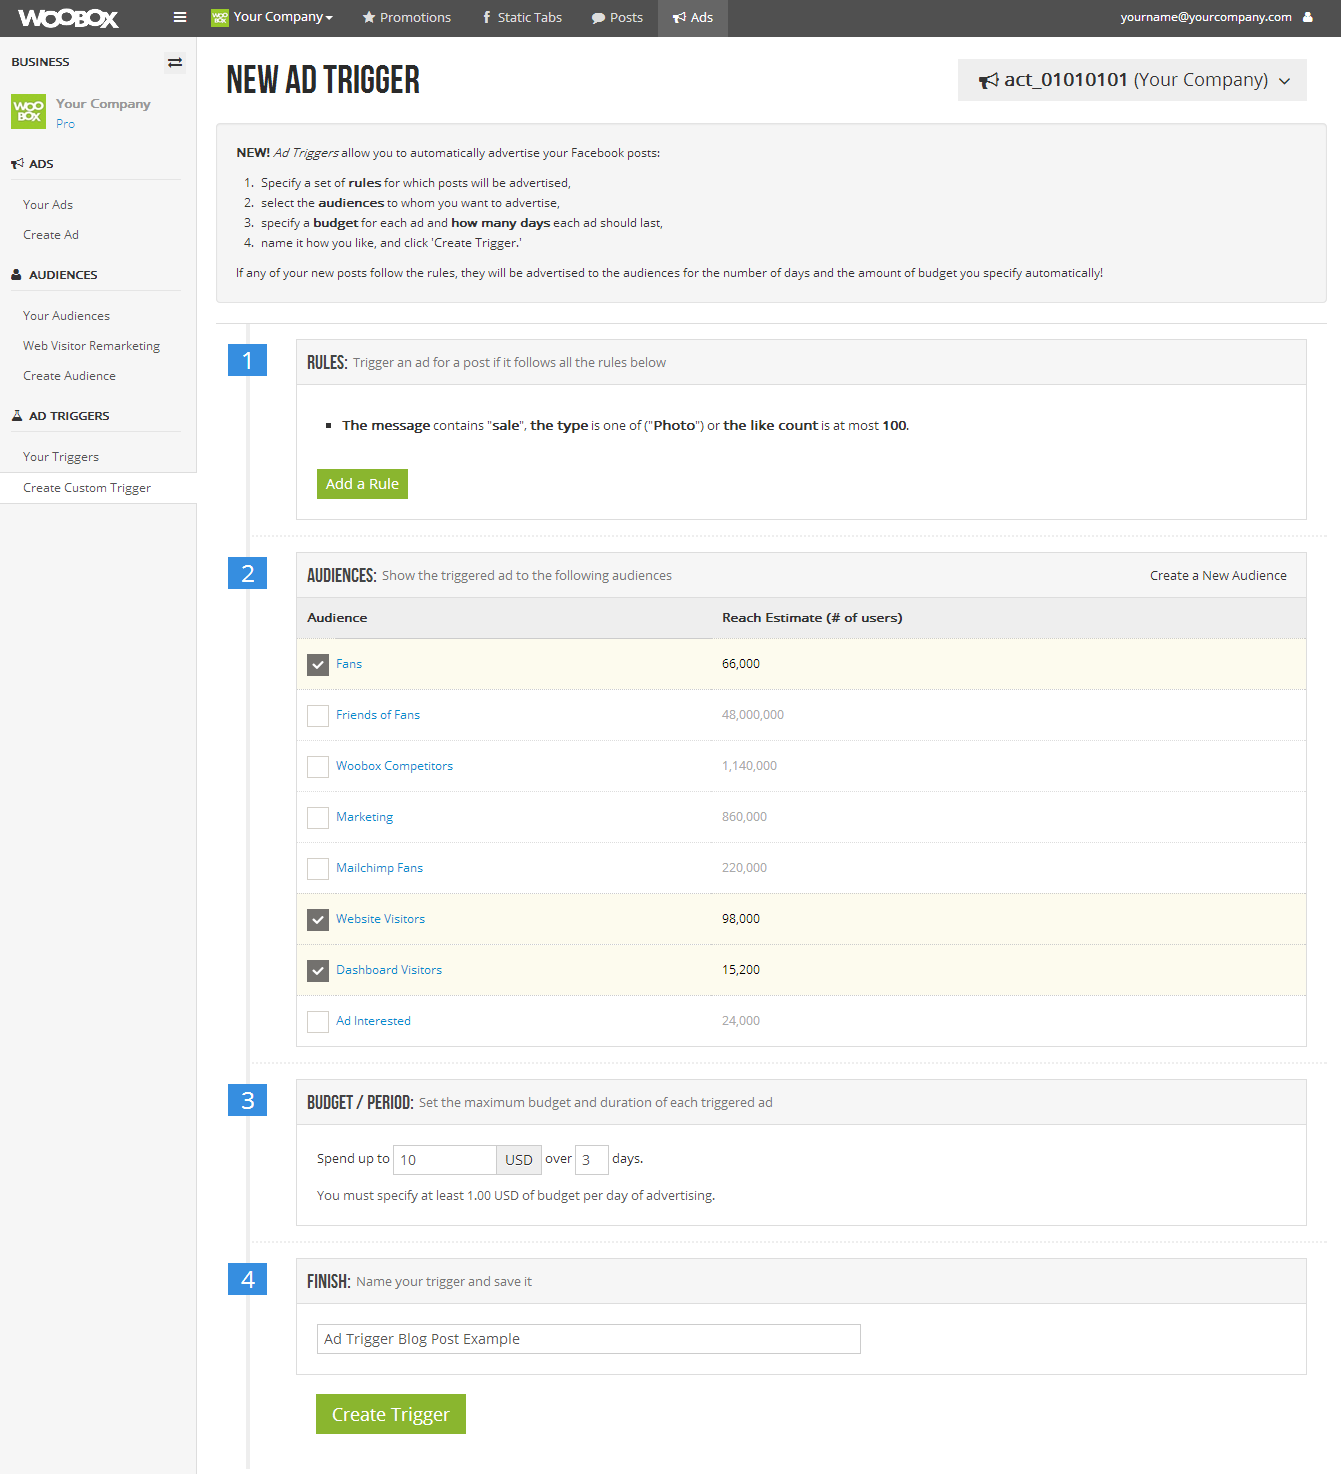
Select Your Audience. The next step is to select the audience that you want to promote the post to. If you have set up target audiences or custom audiences already, they will appear in the list of audience available to choose from. You can select as many audiences as you would like from this list. If you have not set up a new target or custom audience, then you will only be able to choose from the default audiences: “Fans” and “Friends of Fans”.
Set Your Budget and Campaign Duration. You can set whatever budget and duration you want for that Trigger, and change it at any time. The campaign will end when either of those two criteria are satisfied.
Name Your Campaign. The final step is simply to name your Trigger. Give it a name that will make it easy to identify. If you decide later that you didn’t give it a specific enough name, you can always go back and edit the Trigger to give it a new name.
Your completed New Ad Trigger form should look something like this:
Click “Create Trigger” and you’re done! Your new Ad Trigger will now show up in the “Your Ad Triggers” tab:
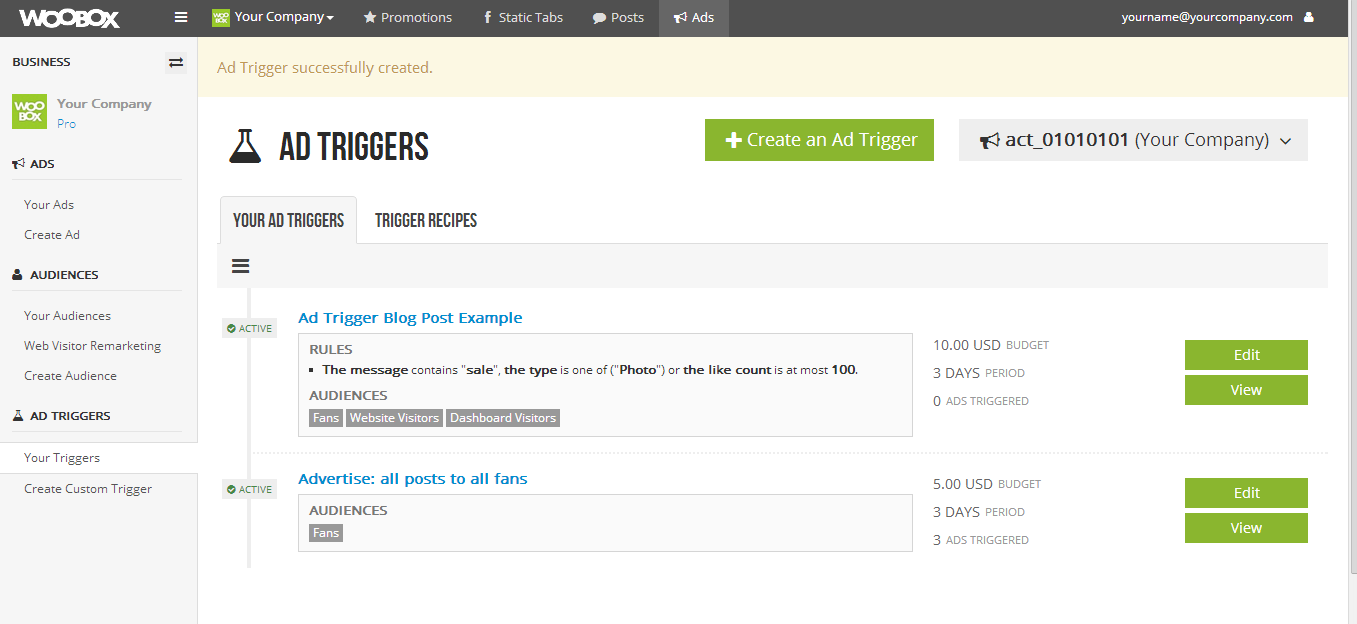
Your Ad trigger is now set up and ready to go! All that’s left to do is create compelling Facebook content and let your Triggers do the rest.
Monitor Performance to Determine Which Posts and Audiences Get Results
The Ad Triggers system builds upon the host of statistics available through our Ads interface. In addition to statistics available for each Ad triggered, each Trigger you create tabulates such essentials as Average Audience Reach and Average Cost-Per-Click among all the Ads triggered thus far.
Click on “View” next to the specific Ad Trigger you want to monitor to see the aggregated stats:

You can compare these metrics with the rules you established for your Ad Trigger to gain major insight into what works and what doesn’t with your audience(s). To view the stats of each individual post, simply click on the “View Stats” button next to that post on the stats page.
So now that you are familiar with Woobox’s new suite of ad tools, we’d love to hear how you are planning on using them in your next campaign! Drop us a note and let us know how they work for you. Who knows, you may be our next great case study!